A Soft and Cozy Rag Quilt for Baby
Lately, it seems there are quite a few new babies being born around these parts. I recently attended a baby shower for one of the sweet expectant mothers.
Sewing for babies is something I really enjoy doing. Therefore, I decided to sew something to take to this shower for a sweet baby boy. Baby blankets and quilts are some of the things I enjoy sewing most and the softer and cozier, the better.
As I was looking for some inspiration, I came across this pretty rag quilt made by a fellow blogger at Dogwood Lane Rambles. I have sewed baby rag quilts in the past, but they were mainly made with squares and had polyester batting in between the squares.
I wanted to try this one because it used three layers of flannel, using one layer of flannel as the batting layer and no other batting or fiberfill. This is a picture of the finished baby rag quilt and matching burp cloths that I made.
I wanted to try this one because it used three layers of flannel, using one layer of flannel as the batting layer and no other batting or fiberfill. This is a picture of the finished baby rag quilt and matching burp cloths that I made.
 |
| Baby Rag Quilt and Matching Burp Cloths |
 |
| Baby Rag Quilt |
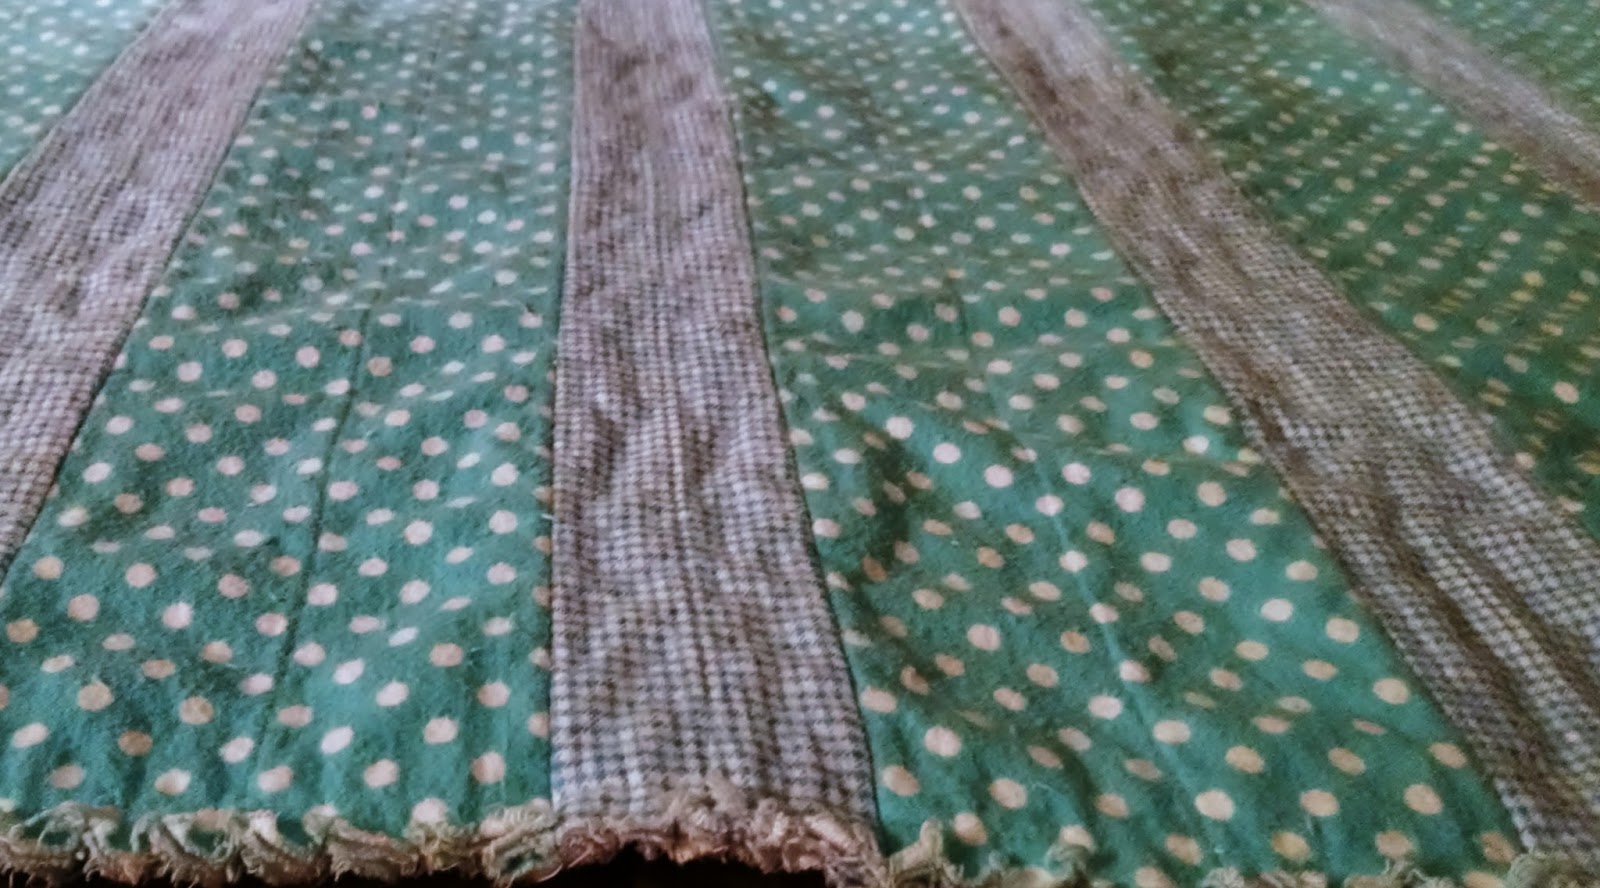
I had some gray/blue tiny checkered flannel, some solid light blue flannel and a stars and clouds patterned flannel in my fabric stash. I did not measure the pieces of flannel I already had, but it was approximately 1-1/4 yards of the blue checkered flannel and about 1-1/4 yards combined of the solid blue and star and cloud patterned flannels. I went out and purchased 2-1/2 yards of a pretty turquois with white polka dots to use for the wider (5 inch) strips for both the front and back of the quilt. I also decided to use the pretty blue checkered flannel for the narrower (3 inch) strips for both the front and back of the quilt. For the padding layer between the front and back of the quilt, I used the solid blue and the star and clouds patterned flannel.
In case any of the fabric should shrink, I washed and dried all of the fabrics before I began cutting the strips for the baby quilt.
Here is a photo of the strips of the different flannel fabrics I used in constructing the quilt.
For making the quilt, I followed the instructions in the post at Dogwood Lane Rambles. Here is the link again. As the instructions stated, I folded all the strips which I was going to use on the top layer of the quilt, lengthwise, down the middle and pressed on the fold. Then, I unfolded these strips and followed the crease-line of the fold as a guideline on top of each layer, sewing, lengthwise, right along the crease in the middle.
In case any of the fabric should shrink, I washed and dried all of the fabrics before I began cutting the strips for the baby quilt.
Here is a photo of the strips of the different flannel fabrics I used in constructing the quilt.
 |
| Flannel Fabrics Used to Construct the Baby Rag Quilt |
Each layer was placed with first strip with right side facing downward, middle and top layers right sides facing upward, making certain that each of the top strips is creased lengthwise straight up the middle. Remember, the crease line was used for my sewing guideline!
The finished quilt contained ten (10) of the 5 inch strips on the front and ten (10) of the 5 inch strips on the back, for a combined total of twenty (20) strips of the turpuos with white polka dots flannel for both the front and the back. For the 3 inch strips on both front a total of sixteen (16) 3 inch strips from the blue checkered fabric. I used eight (8) of the blue checkered 3 inch strips on the front and eight (8) on the back of the quilt. For the batting I mixed the two remaining fabrics and used ten (10) of the solid blue flannel for the 5 inch strips and eight (8) of the star and clouds flannel for the 3 inch strips.
This finished baby rag quilt measures approximately 47x49 inches.
You will note that decorative stitches were used in the quilt tutorial at Dogwood Lane Rambles, but since my very old sewing machine has only a few decorative stitches, I just used a straight stitch to assemble the layers of my quilt.
These are some photos the folded finished quilt, along with two matching burp cloths I made to go along with the quilt.
For making each one of the matching burp clothes, I cut two (2) 10x31 inch pieces of the polka dot flannel fabric to use as the front and back of the burp cloth. I also cut two (2) 3x31 inch strips of the blue checkered flannel fabric to use on the front and back of each cloth for a decorative accent. Note: I did not use any batting fabric in the middle of the burp cloths.
For making each one of the matching burp clothes, I cut two (2) 10x31 inch pieces of the polka dot flannel fabric to use as the front and back of the burp cloth. I also cut two (2) 3x31 inch strips of the blue checkered flannel fabric to use on the front and back of each cloth for a decorative accent. Note: I did not use any batting fabric in the middle of the burp cloths.
Before beginning to sew the burp cloth, I folded each of the 13x31 inch pieces of polka dot flannel, lengthwise, in half, to establish the exact middle of these pieces. I did the same lengthwise folding of each of the two 3x31 inch checkered flannel strips. I arranged each of the polka dot rectangles with right sides up and placed one of the checkered strips, right side up on top of the polka dot rectangle, matching up the crease lines on the rectangles and the strips. This allowed me to make sure the strip was placed straight in the middle of each rectangle. Then, I pinned the strips, face up, to each rectangle.
Then, using a 1/2 seam allowance along each long side, I sewed the decorative strips to the front and back sections of the burp cloth. After the decorative strips had been sewed to each rectangle, I arranged the two rectangles, wrong sides facing together. Then, I pinned the front and back pieces together, taking care that one decorative strip matched up to the other on the front and back panels. I then used a 1/2 inch seam allowance and sewed all the way around the entire burp cloth. After that, I used a couple of straight pins to pin through both rectangles to make sure the decorative strips stayed in place. I then used one of the simple decorative stitches on my sewing machine and, with the crease line as a guide, I sewed a line of decorative stitching down the length of the middle of the strip. This is a picture of the entire front of the finished burp cloth and you can see the decorative stitch down the middle of the burp cloth.
After all the sewing was completed, I washed and dried the quilt and burp cloths a couple of times to fray all the edges of the strips and outside seams.
 |
| Burp Cloth to Match Baby Rag Quilt |
After all the sewing was completed, I washed and dried the quilt and burp cloths a couple of times to fray all the edges of the strips and outside seams.
This is a picture of the front of the finished baby rag quilt.
Here's another picture of the finished rag quilt showing the back side of the quilt.
This is quite an easy quilt to assemble and sew for anyone with fairly basic sewing skills, because it involves mainly straight lines and seams.
 |
| Front of Finished Baby Rag Quilt |
 |
| Front of Finished Baby Rag Quilt |
Here's another picture of the finished rag quilt showing the back side of the quilt.
 |
| Back View of Baby Rag Quilt |
It was quite fun and gratifying to make and gift this comfy and cozy baby rag quilt! Many thanks to Dogwood Lane Rambles for sharing how she made a similar quilt!
I am linking this post up to parties at:
A Round Tuit
DIY Sunday Showcase
I am linking this post up to parties at:
A Round Tuit
DIY Sunday Showcase

Comments